Categories
WordPress

First VPS #4 : How to install WordPress on CentOS7.

同一記事の日本語版

   The さくらの VPS trial period ended on December 2nd. But I continue to use because I have some other things I want to challenge. Maybe I’ll pay monthly charge once or more.

   I’ll write “How to install WordPress”. If you do, you must finish First VPS #1, First VPS #2 and First VPS #3 as the prerequisites, of course. First, I install a WordPress as a Wheel Group User (Mine is centos), i.e like a root user.

Note) ||SELinux and WordPress|| (See httpd_selinux(8))

  1. When I used an install feature such as a plugin’s on WordPress, I had “Failed to connect to FTP Server http://VPS_DomainName/”. This seems to occur because Apache Httpd cannot access the network. The solution is “httpd_can_network_connect –> on”.
    $ sudo setsebool -P httpd_can_network_connect on
  2. When I uploaded an image via WordPress, I had “Unable to create directory wp-content/uploads/year/date. Is its parent directory writable by the server?”. At that time, the parent directory permission was 707. This trouble seems to occur because Apache Httpd cannot read/write the directory due to its context. It fixes the trouble to change the context from ‘httpd_user_content_t’ to ‘httpd_sys_rw_content_t’. But, this brought another issue to me. After the change I could not see the directory from my FTP client software.
    If you don’t care about it, you don’t need to do anything else. But, I care. I sometimes back images up via FTP.
     
    I looked for another solution. And I found it out.
    I change the context not to ‘httpd_sys_rw_content_t’ but to ‘public_content_rw_t’. And I also need ‘httpd_anon_write –> on’ for uploading an image via WordPress.
    $ sudo setsebool -P httpd_anon_write on
    $ sudo semanage fcontext -a -t public_content_rw_t
    "/path/to/wp-content/uploads(/.*)?"

    $ sudo /sbin/restorecon -RF /path/to/wp-content/uploads

    Ref URL: 5.6.2. Persistent Changes: semanage fcontext
    This says ‘restorecon -R’ works but I needed ‘restorecon -RF’ to change the type of the directory though I don’t know why.

||How to install WordPress as a Wheel Group User||

  1. Log in phpMyAdmin as root.
  2. Create a database (something like wordpressdb) for WordPress with the collation ‘utf8_general_ci’.
  3. Create a user (something like wordpressuser) for WordPress with localhost and passphrase.
    GRANT USAGE ON *.* TO wordpressuser@localhost IDENTIFIED BY PASSWORD ‘passphrase’;
     
    Edit privileges. Give the user all privileges except grant about the database ‘wordpressdb’. Give no global privileges. This is important.
    GRANT ALL PRIVILEGES ON wordpressdb.* TO wordpressuser@localhost;
  4. Log out.

——————–

  1. Log on the VPS as centos via SSH. After that, you are at /home/centos.
  2. $ mkdir tmp
    $ chmod 707 tmp

    The tmp folder is for download files.

  3. $ cd tmp
     
    Install ‘wget’ if you don’t have it.
    $ sudo yum install wget
     
    Download WordPress and copy to the install folder.
    $ wget https://wordpress.org/latest.tar.gz
    $ tar xzvf latest.tar.gz
    $ rsync -avP ~/tmp/wordpress/ ~/www/html/wp/
  4. Make the uploads folder.
    $ mkdir ~/www/html/wp/wp-content/uploads
    $ chmod 707 uploads
     
    Change the context type.
    $ sudo semanage fcontext -a -t public_content_rw_t
    "/home/centos/www/html/wp/wp-content/uploads(/.*)?"

    $ sudo /sbin/restorecon -RF /home/centos/www/html/wp/wp-content/uploads

——————–

  1. Access http://VPS_DomainName/wp/ by the Web browser.
  2. At the instillation the wp-config.php wasn’t made automatically. So I made it from the installer showing text by an editor and uploaded it to the VPS via FTP. Set the permission of wp-config.php to 404.
    Otherwise, the WordPress installation normally ended.
     
    Note) I couldn’t make the WordPress got the FTP account information automatically, so I added the followings to the wp-config.php before the line /* That’s all, stop editing! Happy blogging. */. They are for correcting the update issues.
    Ref URL: WordPress Upgrade Constants
     
    define('FTP_USER', 'username');
    define('FTP_PASS', 'password');
    define('FTP_HOST', 'VPS_DomainName');

 
   My PHP is running as a DSO (Apache 2.0 Handler). After the configurations above, the environment gives me ‘centos:centos’ as the owner:group about the upgrading WordPress files but it gives ‘apache:apache’ about the media files which were uploaded from Dashboard. So, by FTP client software I cannot modify the media files though I can back them up because of the user ‘centos‘. And I can change the owner:group by ‘chown’ command via SSH.
 
   This matter gives bigger problems when a person use a normal User. Next I’ll write an installation as a normal user.
 
||How to install WordPress as a normal User||
   Of course you cannot do Server-side works as a normal user. It requires your login user has administrative privileges like my centos.

    [Server Side]——

  1. Log on the VPS as centos via SSH. Make a normal user.
    $ sudo adduser normuser1
    $ sudo passwd normuser1
    Changing password for user normuser1.
    New password:
    Retype new password:
    $ sudo chmod 701 /home/normuser1
  2. Edit /etc/httpd/conf.d/userdir.conf.
    $ sudo vi /etc/httpd/conf.d/userdir.conf Ref URL: UserDir Directive

    • Add UserDir enabled normuser1 after the line UserDir disabled
    • Add UserDir www/html after the line #UserDir public_html
    • <Directory "/home/*/public_html">
      —>> <Directory "/home/*/www/html">
    • Options MultiViews Indexes SymLinksIfOwnerMatch IncludesNoExec
      —>> Options MultiViews SymLinksIfOwnerMatch IncludesNoExec
  3. $ su - normuser1
    $ mkdir www
    $ cd www
    $ mkdir html
     
    Check normuser1 id’s property.
    $ id -a normuser1
    uid=1001(normuser1) gid=1001(normuser1) groups=1001(normuser1)
    $ exit
    $ sudo systemctl restart httpd.service
  4. $ sudo gpasswd -a sennari apache
    Check normuser1 id’s property.
    $ id -a normuser1
    uid=1001(normuser1) gid=1001(normuser1) groups=1001(normuser1),48(apache)
  5. Log in phpMyAdmin as root from the Web browser.
     
    Create a database (something like normuser1db) with the collation ‘utf8_general_ci’ for WordPress.
    Create a user (something like normuser1wp) for WordPress with localhost and passphrase.
    GRANT USAGE ON *.* TO normuser1wp@localhost IDENTIFIED BY PASSWORD ‘passphrase’;
     
    Edit privileges. Give the user all privileges except grant about the database ‘normuser1db’. Give no global privileges. This is important.
    GRANT ALL PRIVILEGES ON normuser1db.* TO normuser1wp@localhost;
     
    Logout.
    [Client Side]——

  1. Access normuser1’s DocumentRoot by FTP client software.
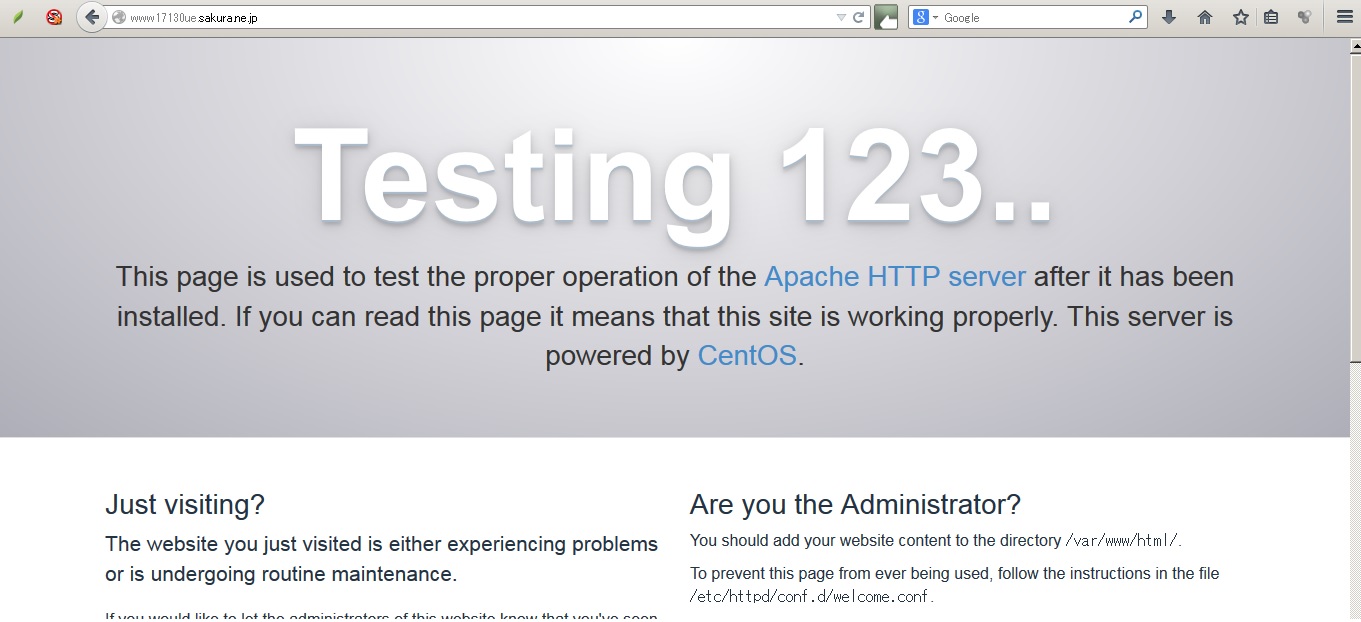
    Upload an index.html file as a test. Go and see http://VPS_DomainName/~normuser1/ for a test.
     
    As an aside, I used a base64 encoded in-line image scheme for this index.html (^^).
  2. Create a wp folder in the DocumentRoot by the FTP client software.
    Upload all WordPress files into the wp folder via FTP.
  3. Access http://VPS_DomainName/~normuser1/wp/ by the browser and install WordPress.
     
    At the instillation the wp-config.php wasn’t made automatically. So I made it from the installer showing text by an editor and uploaded it to the VPS via FTP. Set the permission of wp-config.php to 404 .
    Otherwise, the WordPress installation normally ended.
     
    Note) I couldn’t make the WordPress got the FTP account information automatically, so I added the followings to the wp-config.php before the line /* That’s all, stop editing! Happy blogging. */. They are for correcting the update issues.
    Ref URL: WordPress Upgrade Constants
     
    define('FTP_USER', 'username');
    define('FTP_PASS', 'password');
    define('FTP_HOST', 'VPS_DomainName');

   After the steps above, I upgraded WordPress 4.0 to 4.1. It successfully ended. But I could not uploaded media files in spite I had made a uploads folder with its permission 707. So, I did the followings.

  1. By the FTP client software, set the permission of uploads folder to 775 because apache needs full access rights to it.
  2. Next three I did as the user centos via SSH. Normal users cannot do them. I think this is very inconvenient when people run production sites with multiple users because two of these three I could not do until making the uploads folder.
    • $ sudo chown -R normuser1:apache
      /home/normuser1/www/html/wp/wp-content/uploads
    • $ sudo semanage fcontext -a -t public_content_rw_t
      "/home/normuser1/www/html/wp/wp-content/uploads(/.*)?"
    • $ sudo restorecon -RF /home/sennari/www/html/wp/wp-content/uploads

   Now I have a question. Why does WordPress use different methods about upgrades and media uploads? If it use the method of upgrades for media file uploads, the troubles probably do not occur. Though I don’t realize as I don’t know much about PHP, does the same method for both make something wrong?
 
   Anyway, I’ll try suEXEC Support.

Categories
Uncategorized

Memorandum #9.

同一記事の日本語版

A flock of sparrows
A flock of sparrows
   Yesterday, I saw a pretty flock of sparrows. Nowadays this is very rare in my town though I often saw flocks of sparrows in the rice fields when I was a child. I think the opportunities to see sparrows are decreased despite they were very popular birds and we have a lot of folktales of them. I took a picture of them.
Shrohara???
Shrohara???
 
   Today I saw the bird on the left image. I think this is Shirohara. Am I correct?
 
   By the way, I updated some server software on my Web server yesterday (The server OS is Win7 HP SP1 x86).
 

Categories
Uncategorized

phpMyAdmin 4.3.0 is released.

同一記事の日本語版

   They released phpMyAdmin 4.3.0 on December 5 and 4.3.1 on December 8. So I updated to 4.3.1 from 4.2.13.1 yesterday. Here is the ChangeLogs. The 4.3.0 has a tons of improvements by RFE(Request for enhancement). The 4.3.1 is a bugfix version.

   I downloaded a phpMyAdmin-4.3.1-english.zip, extracted it, copied my old config.inc.php to the phpmyadmin folder made from extracting, and uploaded all of them to the server (See “To create a Wamp-like Web Server in Windows7-#3.“).

   By the way, when I compared the new config.sample.inc.php with my old one(=Ver.4.2.x), I found a line was lost and a line was added.

At /* Storage database and tables */ area
   The lost line.
     // $cfg[‘Servers’][$i][‘designer_coords’] = ‘pma__designer_coords’;

   The added line.
     // $cfg[‘Servers’][$i][‘central_columns’] = ‘pma__central_columns’;

4.3.1 alerts
4.3.1 alerts
   So, when I logged on the new phphmyadmin as root at the first time, I got “The phpMyAdmin configuration storage is not completely configured, some extended features have been deactivated. Find out why. Or alternately go to ‘Operations’ tab of any database to set up it there”.

   By clicking ‘Find out why’, I got the alerts like the right image.

   I had instructions, too.

     Quick steps to setup advanced features:

     Create the needed tables with the ./examples/create_tables.sql.
     Create a pma user and give access to these tables.
     Enable advanced features in configuration file (config.inc.php), for example by starting
     from config.sample.inc.php.
     Re-login to phpMyAdmin to load the updated configuration file.

   I did the followings.

  1. Log on the new version with the old config.inc.php as root.
  2. Add the ALTER privilege to the controluser(Default : pma) on the database phpmyadmin.
  3. Import the new create_tables.sql. If you change the database name(Default : phpmyadmin) and the controluser name(Default : pma), you need to customize the sql file before import. See “Configuration storage“.
  4. Log out.
  5. Edit the old config.inc.php.
    • Delete the line.
           $cfg[‘Servers’][$i][‘designer_coords’] = ‘pma__designer_coords’;
    • Add the line.
           $cfg[‘Servers’][$i][‘central_columns’] = ‘pma__central_columns’;
  6. Log on as root, again.
  7. Drop the table pma__designer_coords.

   That’s it.

   About pma__central_columns, see central_columns.

Categories
translation

The translation “Seijō no Ran (青条の蘭)”-#9.

   I’ve posted the chapter 5, “Seijō no Ran (青条の蘭)” after a long interval.

   I have added some new explanations to the notes.

   I’ve tried to remove Kanjis from the old translations, though it is not progressing as much as I hope (;´o`).

Categories
everyday life

Yesterday Hayabusa 2 successfully launched!!

同一記事の日本語版

   Yesterday Hayabusa 2 successfully launched, wow!! At that time, I spent hours watching the live streaming on YouTube. What were you doing?

   You can watch the video on YouTube easily. “Asteroid Explorer ‘Hayabusa2’ Launch Live Broadcast”

   His return is scheduled in 2020. What a long journey!! The place where he would return is in Australia as same as his brother Hayabusa’s. I pray for peace. We have to protect the world peace, or, we could not recover its capsule if we have the war between Australia and Japan or WW III when his return. I think the peaceful uses of space require the peaceful world. But, the world… I hope that is my imaginary fears, though.

Categories
Linux

First VPS #3 : How to configure LAMP on CentOS7.

同一記事の日本語版

   Yesterday, they announced Hayabusa 2 Launch rescheduled again. The new schedule for it is at 13:22:04 on December 3(JST). I hope good weather which makes third time lucky aha.

   I’ll create a LAMP server on CentOS7 with SELinux enforcing in VPS.
   But before this, I did the three four things.

  1. $ sudo vi /etc/pam.d/su
    Then, uncomment the next line.
    #auth required pam_wheel.so use_uid –>> auth required pam_wheel.so use_uid
    Now the OS permits for only the users in Wheel Group can become root by ‘su’ command.
  2. $ sudo vi /etc/aliases
    Then, uncomment the last line of the file and change the user name.
    #root: marc –>> root: centos
    $ sudo newaliases
    By this, the user centos can get root’s mail.
  3. Check up on the time zone.
    $ sudo timedatectl status
    Everything is OK.
    $ sudo systemctl status chronyd.service
    I had “System clock wrong by 1.088336 seconds, adjustment started” in the result, so I edited /etc/chrony.conf.
    $ sudo vi /etc/chrony.conf
    In the file I found “# Use public servers from the pool.ntp.org project.”, and I went to pool.ntp.org. I added the lines with ‘+’ at their head and deleted ‘-’s by the instructions.
    +server 0.pool.ntp.org iburst
    +server 1.pool.ntp.org iburst
    +server 2.pool.ntp.org iburst
    +server 3.pool.ntp.org iburst
    server 0.centos.pool.ntp.org iburst
    server 1.centos.pool.ntp.org iburst
    server 2.centos.pool.ntp.org iburst
    server 3.centos.pool.ntp.org iburst
    Then, restart the service and check again.
    $ sudo systemctl restart chronyd.service
    $ sudo systemctl status chronyd.service
    Now everything is OK.
  4. For automatic updates.
    $ sudo yum install yum-cron
    $ sudo vi /etc/yum/yum-cron.conf
     line# 20: apply_updates = no –>> apply_updates = yes
    $ sudo systemctl start yum-cron.service
    $ sudo systemctl enable yum-cron.service

1 Install Apache Httpd   2 Install MariaDB   3 Install PHP
4 Install phpMyAdmin   5 Install vsftpd

 
||Install Apache Httpd||

  1. $ sudo yum install httpd
    The installed version is httpd.x86_64 2.4.6-18.el7.centos.
  2. Edit /etc/httpd/conf/httpd.conf.
    $ sudo vi /etc/httpd/conf/httpd.conf
     
    Show line numbers by ‘:set nu’.

    • line# 42: Listen 80 –>> Listen Server_global_IP:80
    • line# 86: ServerAdmin root@localhost –>> ServerAdmin My_email_address
    • line# 95: #ServerName www.example.com:80 –>> ServerName VPS_DomainName:80
    • line# 119: DocumentRoot "/var/www/html" –>> DocumentRoot "/home/centos/www/html"
    • line# 124: <Directory "/var/www"> –>> <Directory "/home/centos/www">
    • line# 131: <Directory "/var/www/html"> –>> <Directory "/home/centos/www/html">
    • line# 144: Options Indexes FollowSymLinks –>> Options FollowSymLinks
    • line# 151: AllowOverride None –>> AllowOverride FileInfo Indexes Limit
      In my case, this change is for WordPress use.
    • line# 164: DirectoryIndex index.html –>> DirectoryIndex index.php index.html
  3. Note) The location of exstra.conf files: /etc/httpd/conf.d
    The extra conf files by default: autoindex.conf, userdir.conf, welcome.conf
  4. Note2) The location of module.conf files: /etc/httpd/conf.modules.d/
  5. Note3) I do not rotate log files but the Apache Httpd seems to be able to make it automatically (See /var/log/httpd/ after more than one-day server running). From when can it do this?? Or is this CentOS7’s own feature?
  6. Usually ~userid has the permission 700, but it needs 701 for httpd accessibility. This information on the userdir.conf.
    $ chmod 701 centos
  7. I set the DocumentRoot to an user’s home directory, so I need to tell it to SELinux and to allow httpd to access User Home Directory. This information is on httpd_selinux(8). However, when I tried to read it, CentOS7 said it’s empty, oops!!
    See online httpd_selinux(8).
    $ sudo setsebool -P httpd_enable_homedirs on
    $ sudo systemctl start httpd.service
    I had the error message “Job for httpd.service failed. See ‘systemctl status httpd.service’ and ‘journalctl -xn’ for details.” when I first started httpd.service. Because I forgot to create ‘www’ and ‘html’ directories. So I made them as the user centos.
    [centos@localhost ~]$ mkdir www
    [centos@localhost ~]$ cd www
    [centos@localhost www]$ mkdir html
    Check the directories context.
    $ ls -Z
    drwxrwxr-x. test test unconfined_u:object_r:httpd_user_content_t:s0 www
    $ ls -Z
    drwxrwxr-x. test test unconfined_u:object_r:httpd_user_content_t:s0 html
  8. $ sudo systemctl start httpd.service again.
  9. $ sudo firewall-cmd --permanent --zone=public --add-service=http
    Httpd Testing page
    Httpd Testing page
    $ sudo firewall-cmd --reload
    $ sudo systemctl enable httpd.service
    Note4) Each Well-Known-Port seems to be set by default. So you don’t need firewall-cmd command for port 80.
  10. Access http://VPS_DomainName/. You can see a page like the right image.

||Install MariaDB||

  1. $ sudo yum install mariadb-server mariadb
    The installed version is mariadb.x86_64 1:5.5.40-1.el7_0 & mariadb-server.x86_64 1:5.5.40-1.el7_0.
  2. $ sudo systemctl start mariadb
  3. $ sudo mysql_secure_installation
    Enter current password for root (enter for none): <<-- Hit [Enter] key. Set root password? [Y/n] <<-- Hit [Enter] key. New password: <<-- Type a password for root. Re-enter new password: <<-- Type the password again.   Hit [Enter] key for each question below ⇩. Remove anonymous users? [Y/n]
    Disallow root login remotely? [Y/n]
    Remove test database and access to it? [Y/n]
    Reload privilege tables now? [Y/n]
  4. $ sudo systemctl enable mariadb.service

||Install PHP||

  1. $ sudo yum install php php-mysql php-mbstring
    The installed version is php.x86_64 5.4.16-23.el7_0.3 , php-mbstring.x86_64 5.4.16-23.el7_0.3 & php-mysql.x86_64 5.4.16-23.el7_0.3.
    At the instllation, the php.conf is created in /etc/httpd/conf.d automatically.
  2. Edit /etc/php.ini.
    $ sudo vi /etc/php.ini
     
    Show line numbers by ‘:set nu’.

    • line# 243: output_buffering = 4096 –>> output_buffering = Off
    • line# 314: disable_functions = –>> disable_functions ="shell_exec, suexec, passthru"
    • line# 375: expose_php = On –>> expose_php = Off
    • line# 811: allow_url_fopen = On –>> allow_url_fopen = Off
    • line# 878: ;date.timezone = –>> date.timezone ="Asia/Tokyo"

    Note5) The location of additional.ini files: /etc/php.d
    The additional ini files by default: curl.ini, fileinfo.ini, json.ini, mbstring.ini, mysql.ini, mysqli.ini, pdo.ini, pdo_mysql.ini, pdo_sqlite.ini, phar.ini, sqlite3.ini, zip.ini

  3. $ sudo systemctl restart httpd.service

||Install phpMyAdmin||

  1. I need phpMyAdmin he-he. However I could not find it among the three repositories, base, extras and updates. So, I added ‘epel’.
    $ sudo yum install epel-release
  2. $ sudo yum install phpmyadmin
    The installed version is phpMyAdmin.noarch 4.2.11-1.el7.
    At the instllation, the phpMyAdmin.conf is created in /etc/httpd/conf.d automatically.
  3. Edit /etc/httpd/conf.d/phpMyAdmin.conf
    $ sudo vi /etc/httpd/conf.d/phpMyAdmin.conf

    Here is my phpMyAdmin.conf. See below.
    # phpMyAdmin - Web based MySQL browser written in php
    #
    # Allows only localhost by default
    #
    # But allowing phpMyAdmin to anyone other than localhost should be considered
    # dangerous unless properly secured by SSL

    Alias /phpMyAdmin /usr/share/phpMyAdmin
    Alias /phpmyadmin /usr/share/phpMyAdmin

    <Directory /usr/share/phpMyAdmin/>
       AddDefaultCharset UTF-8

       <IfModule mod_authz_core.c>
         # Apache 2.4
         <RequireAny>
           Require ip my_global_IP
           Require host my_mobile_host
         </RequireAny>
       </IfModule>
    </Directory>

    <Directory /usr/share/phpMyAdmin/setup/>
       <IfModule mod_authz_core.c>
         # Apache 2.4
         <RequireAny>
           Require ip my_global_IP
           Require host my_mobile_host
         </RequireAny>
       </IfModule>
    </Directory>

  4. $ sudo systemctl restart httpd.service

||Install vsftpd||

  1. $ sudo yum install vsftpd
    The installed version is vsftpd.x86_64 3.0.2-9.el7.
  2. Edit /etc/vsftpd/vsftpd.conf.
    $ sudo vi /etc/vsftpd/vsftpd.conf
     
    Show line numbers by ‘:set nu’.

    • line# 12: anonymous_enable=YES –>> anonymous_enable=NO
    • line# 82: #ascii_upload_enable=YES –>> ascii_upload_enable=YES
    • line# 83: #ascii_download_enable=YES –>> ascii_download_enable=YES
    • line# 100: #chroot_local_user=YES –>> chroot_local_user=YES
    • line# 101: #chroot_list_enable=YES –>> chroot_list_enable=YES
    • line# 103: #chroot_list_file=/etc/vsftpd/chroot_list –>> chroot_list_file=/etc/vsftpd/chroot_list
    • line# 128: –>> local_root=www/html
  3. $ sudo setsebool -P ftp_home_dir on
    Because I uncomment local_enable=YES. This information is on the vsftpd.conf.
  4. $ sudo vi /etc/vsftpd/chroot_list
    I added ‘admin’ to the chroot_list.
  5. When I made “chroot_~” uncommented and an access via FTP as a normal user, I had 500 OOPS: vsftpd: refusing to run with writable root inside chroot(), so I added allow_writeable_chroot=YES to the vsftpd.conf. This information I found on 500 OOPS: vsftpd: refusing to run with writable root inside chroot() Login failed on debian.
    line# 104: –>> allow_writeable_chroot=YES
  6. $ sudo systemctl start vsftpd.service
    $ sudo systemctl enable vsftpd.service
    $ sudo firewall-cmd --permanent --zone=public --add-service=ftp
    $ sudo firewall-cmd --reload